Facebook Apps and Windows Azure Web Sites
Windows Azure Web Sites (WAWS) is a great platform for deploying Facebook Applications. Not only is it super easy to deploy your application to WAWS, but it is also free to get started. In this first part you will see how to build a site using ASP.NET MVC 4 and the Facebook C# SDK that allows your users to login to your application with Facebook. For this post I will be using Visual Studio 2012 RC, but you could also use Visual Studio 2010. I will be targeting .Net 4.0 as .Net 4.5 is not yet supported in Windows Azure Web Sites.
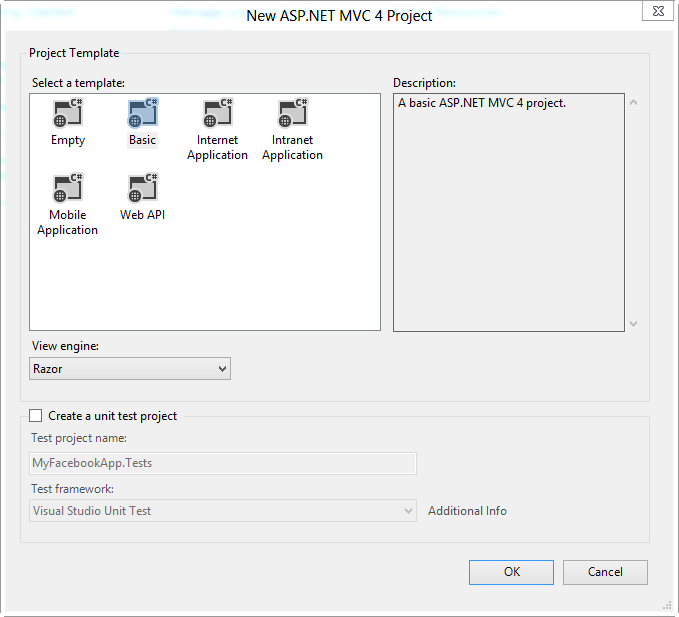
To begin I have created an ASP.NET MVC 4 using the basic project template.
Next, add the Facebook C# SDK to the project using NuGet by running the following command.
Install-Package Facebook
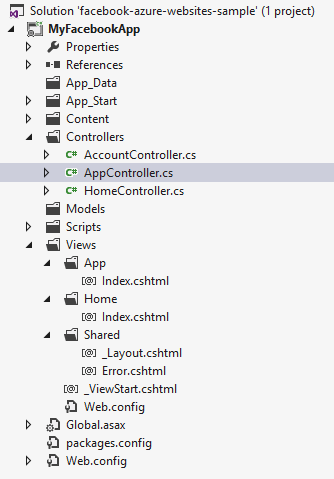
Next, we need to build the basic components of the application. I am going to add three controllers – HomeController, AccountController, and AppController. Additionally, I am going to add two views App/Index.cshtml and Home/Index.cshtml. The App/Index view will be show to authenticated users and the Home/Index view will be the public landing page for the application.
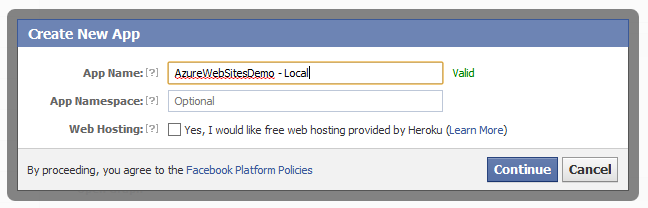
The AccountController won’t have any views in our simple application; it will only be used to perform the server-side functions for Facebook Authentication. In a real application you may want to use the AccountController to handle alternate authentication methods and tasks like resetting your account password. Now that we have our basic application shell setup we need create a Facebook Application on Facebook’s developer site. For this demo I am actually going to create two different applications – one will be used for local development and the other will be used for production deployments. This is a common practice for Facebook developers. When you login to Facebook’s developer site click the “Create New App” button. You will need to perform these steps twice, once for local development and once for production. I tend to use the naming convention “MyAppName – Local” for my local test app and “MyAppName” for my production app. You could also have a “MyAppName – Staging” for a staging app if you wanted.
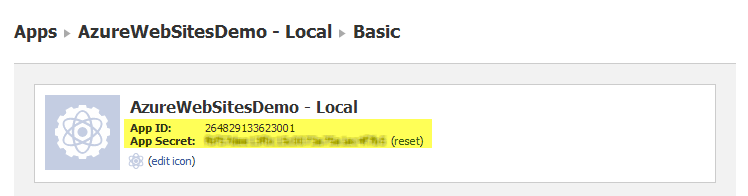
After each of your applications are created you will be taken to the app information page. You will see both your App Id and App Secret on these pages. Save this information for both apps as you will need it in the next step.
Next set the App Id and App Secret values in our web.config files so we can use them in our application. We can use Web.config transforms in order to set the appropriate Facebook application for local development or production. For local development add the following keys to your Web.config file.
<appSettings>
  ...
  <add key="FacebookAppId" value="your_local_app_id"/>
  <add key="FacebookAppSecret" value="your_local_app_secret" />
</appSettings>
For the production environment add the following keys to your Web.Release.config file.
<appSettings>
<add key="FacebookAppId" value="your_prod_app_id"
   xdt:Transform="SetAttributes" xdt:Locator="Match(key)"/>
<add key="FacebookAppSecret" value="your_prod_app_secret"
   xdt:Transform="SetAttributes" xdt:Locator="Match(key)" />
</appSettings>
Next we will setup our MVC Application for user authentication using Facebook’s OAuth API. To begin, we set a page that will be secured. Open your AppController and add the [Authorize] attribute to the controller as shown below. This will ensure that only authorized users can access this page.
[Authorize]
public class AppController : Controller
{
  //
  // GET: /App/

  public ActionResult Index()
  {
    return View();
  }

}
The next step is to create our Facebook login action. We will do this in the AccountController. To begin, rename the Index action to Login. Next we need to create the Facebook OAuth url and redirect our user there. You can see below how to do this using the Facebook C# SDK.
public class AccountController : Controller
{
  //
  // GET: /Account/Login

  public ActionResult Login()
  {
    // Build the Return URI form the Request Url
    var redirectUri = new UriBuilder(Request.Url);
    redirectUri.Path = Url.Action("FbAuth", "Account");

    var client = new FacebookClient();

    // Generate the Facebook OAuth URL
    // Example: https://www.facebook.com/dialog/oauth?
    //                client_id=YOUR_APP_ID
    //               &redirect_uri=YOUR_REDIRECT_URI
    //               &scope=COMMA_SEPARATED_LIST_OF_PERMISSION_NAMES
    //               &state=SOME_ARBITRARY_BUT_UNIQUE_STRING
    var uri = client.GetLoginUrl(new
    {
      client_id = ConfigurationManager.AppSettings["FacebookAppId"],
      redirect_uri = redirectUri.Uri.AbsoluteUri,
      scope = "email",
    });

    return Redirect(uri.ToString());
  }
}
Next, go ahead and run the site and navigate to http://localhost:####/App, where #### is the port number your site is running on. Because the AppController requires users to be authenticated you will be redirected to the Facebook OAuth page. However, you will notice that Facebook will give you an error as shown below.
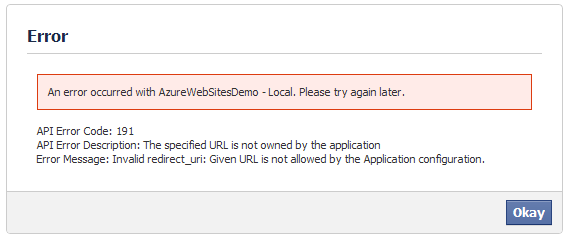
This error is caused by our redirect_uri not being set as our Site url in the Facebook App settings. To remedy this go back to your Facebook App settings and set the value of Site url equal to the local url your application is running. You can see this setting below. Note, we will need to perform this same step on the production app as well.

After you have saved this setting, return navigate your browser again to http://localhost:####/App. You will now be redirected to the Facebook OAuth dialog asking you to authorize your application.
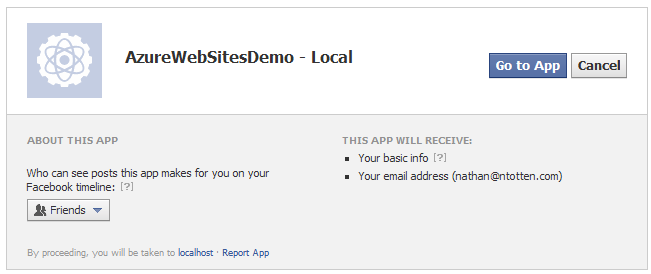
After you click “Go to App” Facebook will redirect the user to the URL specified in the redirect_uri parameter as specified above. In this case the redirect_uri is http://localhost:####/Account/FbAuth. We have not created this page so you will receive a 404 error.
The FbAuth action that Facebook will redirect the user is responsible for reading the Facebook authorization result information, validating that information, and setting the user authentication cookie. You can perform these actions with the code below.
public ActionResult FbAuth(string returnUrl)
{
  var client = new FacebookClient();
  var oauthResult = client.ParseOAuthCallbackUrl(Request.Url);

  // Build the Return URI form the Request Url
  var redirectUri = new UriBuilder(Request.Url);
  redirectUri.Path = Url.Action("FbAuth", "Account");

  // Exchange the code for an access token
  dynamic result = client.Get("/oauth/access_token", new
  {
    client_id = ConfigurationManager.AppSettings["FacebookAppId"],
    redirect_uri = redirectUri.Uri.AbsoluteUri,
    client_secret = ConfigurationManager.AppSettings["FacebookAppSecret"],
    code = oauthResult.Code,
  });

  // Read the auth values
  string accessToken = result.access_token;
  DateTime expires = DateTime.UtcNow.AddSeconds(Convert.ToDouble(result.expires));

  // Get the user's profile information
  dynamic me = client.Get("/me",
          new {
           fields = "first_name,last_name,email",
           access_token = accessToken
          });

  // Read the Facebook user values
  long facebookId = Convert.ToInt64(me.id);
  string firstName = me.first_name;
  string lastName = me.last_name;
  string email = me.email;

  // Add the user to our persistent store
  var userService = new UserService();
  userService.AddOrUpdateUser(new User
  {
    Id = facebookId,
    FirstName = firstName,
    LastName = lastName,
    Email = email,
    AccessToken = accessToken,
    Expires = expires
  });

  // Set the Auth Cookie
  FormsAuthentication.SetAuthCookie(email, false);

  // Redirect to the return url if availible
  if (String.IsNullOrEmpty(returnUrl))
  {
    return Redirect("/App");
  }
  else
  {
    return Redirect(returnUrl);
  }
}
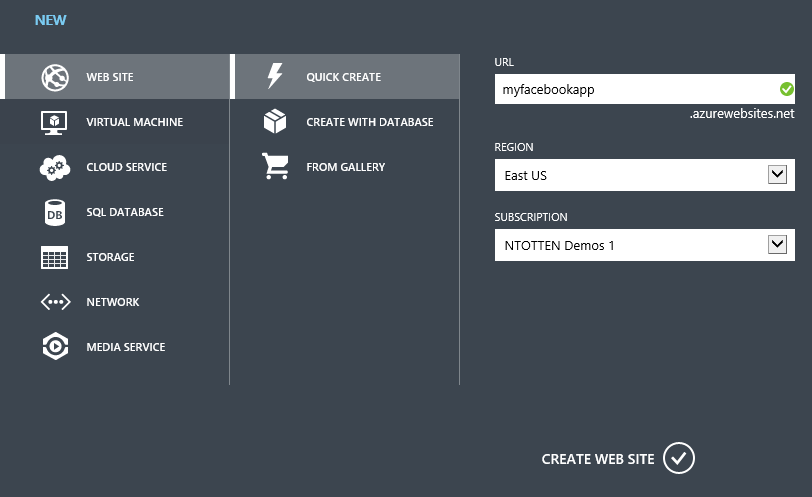
That is everything required to authenticate a user with Facebook. Now all that remains is to publish the site to Windows Azure Web Sites. If you don’t already have a Windows Azure account you can sign up for a free trial on WindowsAzure.com. If you already have an account login in the new management portal and click “New” and click “Web Site”. Select quick create and fill in the form as shown below. Use your own URL for your application.
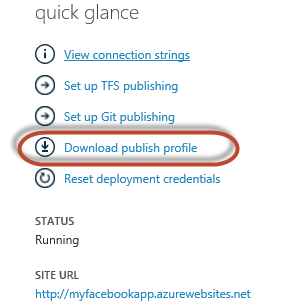
Click “Create Web Site” and wait a few seconds for your site to be created. After the site is ready click the name to go to the web site dashboard. On the dashboard page you will see a set of links on the left side under the heading “quick glance”. Click the link titled “Download publish profile” as show.
A file, called a publish profile, will be downloaded that contains all the information necessarily to publish your web site to Windows Azure right from Visual Studio.
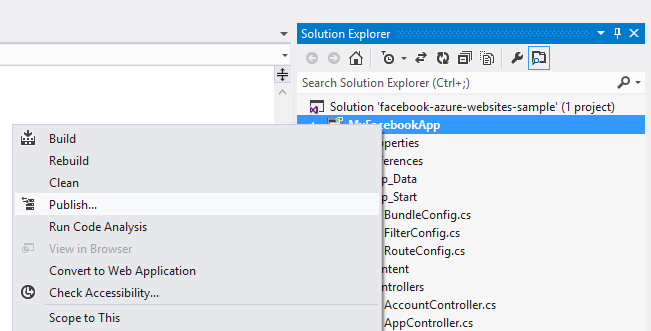
Back in Visual Studio right-click on your project and click “Publish”.
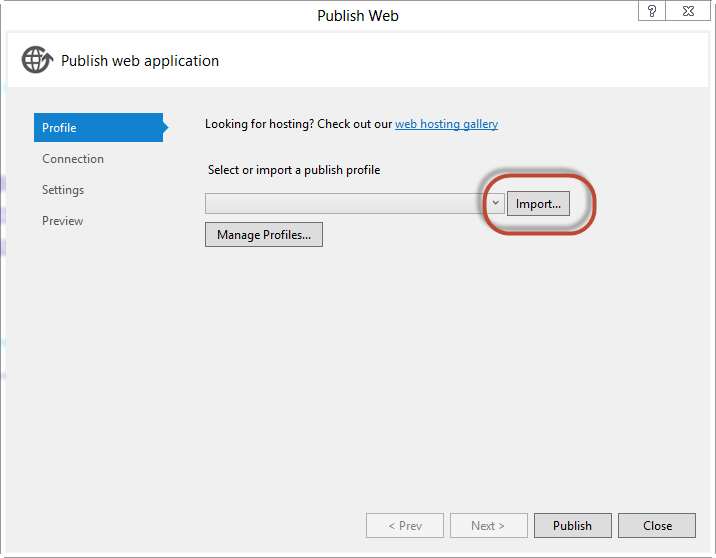
This will open the Web Publish dialog. In this dialog click “Import” and select the publish profile that you downloaded in the previous step.
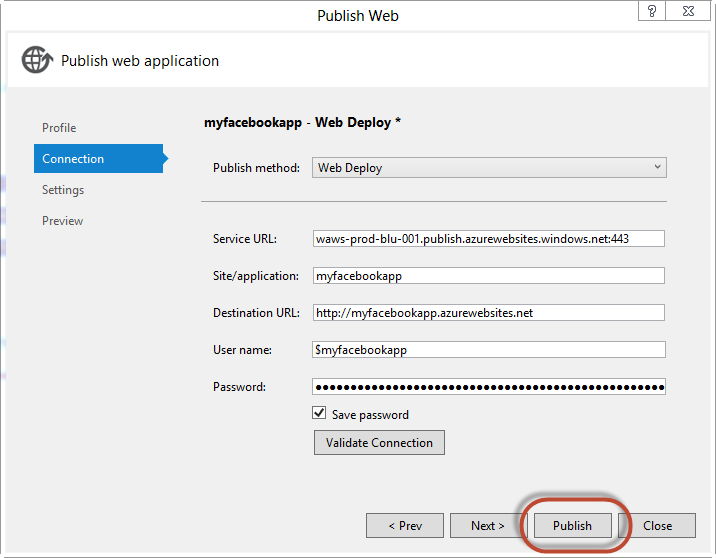
After you have imported the publish profile the Publish Web window will populate with the information needed to publish your website. Click “Publish” to publish your site.
After the publish process has completed your website will open. As noted above, we need to set the production Facebook App with the correct site Url in the same way we did with our local application. To do this open your Facebook App settings in the Facebook developer portal and set the Site Url to your Windows Azure Web Site Url (http://yoursitename.azurewebsites.net). With this step complete you can now navigate to http://yoursitename.azurewebsites.net/App and login with your Facebook account.
You can find the entire source for this demo application on Github. Additionally, keep an eye out on this blog for two additional posts on Facebook development with Windows Azure Websites.